Navigation
  • Home
  • About
    • Inside My Vegan Pantry
    • My 1 Year Vegan Anniversary
    • How I Got Over My Cheese Addiction
  • Recipes
    • Breakfast
    • Lunch
    • Dinner
    • Dessert
    • Snacks/Appetizers
  • Resources
    • Is it Expensive to be Vegan?
    • Top 10 Kitchen Tools
    • Top 10 Cookbooks
    • Vegan Picks
    • How-to Guides
    • Cooking Tips
    • Recipe Ideas
  • My Food Photos
  • Contact

How to Make Chia Seed Jam

May 29, 2014 6 Comments

Chia-Seed-Jam I can’t believe I’ve kept this super easy jam recipe a secret from you, but it seems as though I did. I’ve always loved homemade jams, and would buy them often at farmer’s markets in the summer, but never made them myself because I felt like it would be too much work. A few months back, a friend of mine introduced me to chia seed jam, and I’ve been hooked ever since. Now I make homemade jam all the time. Vegan-Chia-Seed-Jam 
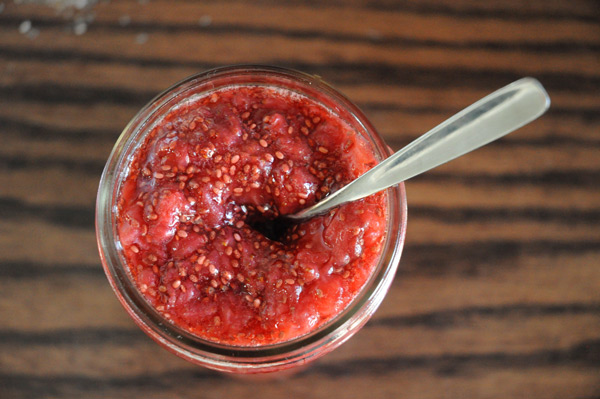
I love how simple it is to prepare a fresh batch of my very own jam, adding as much, or as little, sweetener as I want. Store-bought jams are almost always way too sweet, aren’t they? I think so. Strawberry-Chia-Seed-Jam
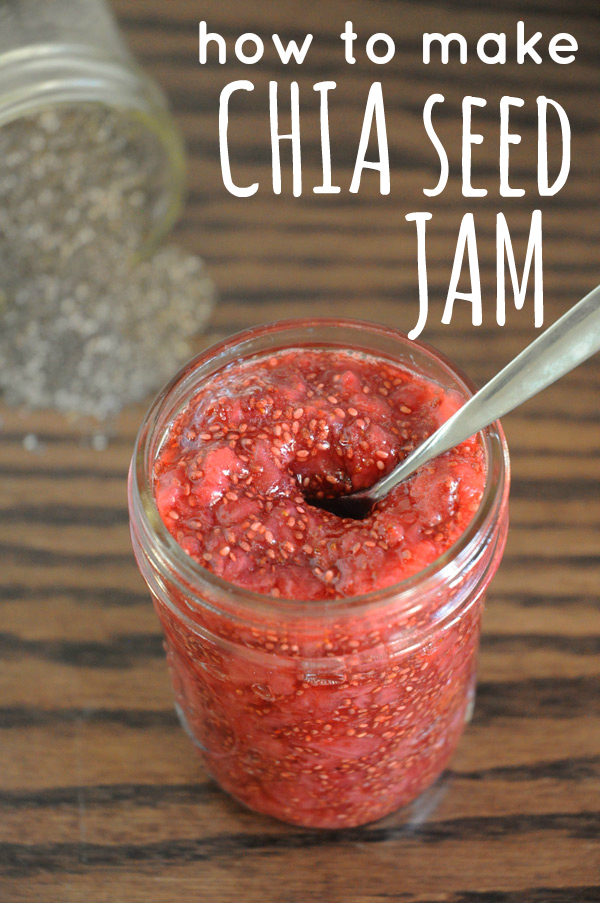
So far I’ve only made blueberry jam and this strawberry jam, but once I do some raspberry picking this summer, I’ll make a batch of raspberry jam, too. Blackberry would also be nice. And peach. And grape. Ahhh, there are so many options! Toast-with-Chia-Seed-Jam 
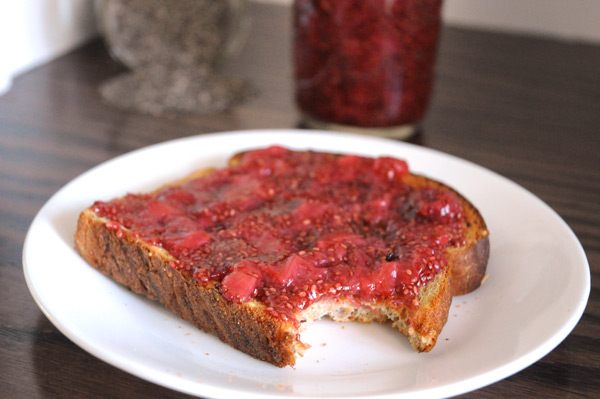
And all thanks to the goodness of chia seeds, which are amazing because they: Balance blood sugar Add healthy omega-3 oil to your diet Make you feel more energized Cut your cravings Combat diseases Provide you with stronger teeth & bones Are a great source of protein Help fight belly fat and so much more! I love these little guys. Chia-Seed-Jam-Vegan

How to Make Chia Seed Jam
 
Print
Prep time
5 mins
Cook time
25 mins
Total time
30 mins
 
Author: Vegan Insanity
Recipe type: How-to Guide
Cuisine: Chia Seed Jam
Serves: Varies
Ingredients
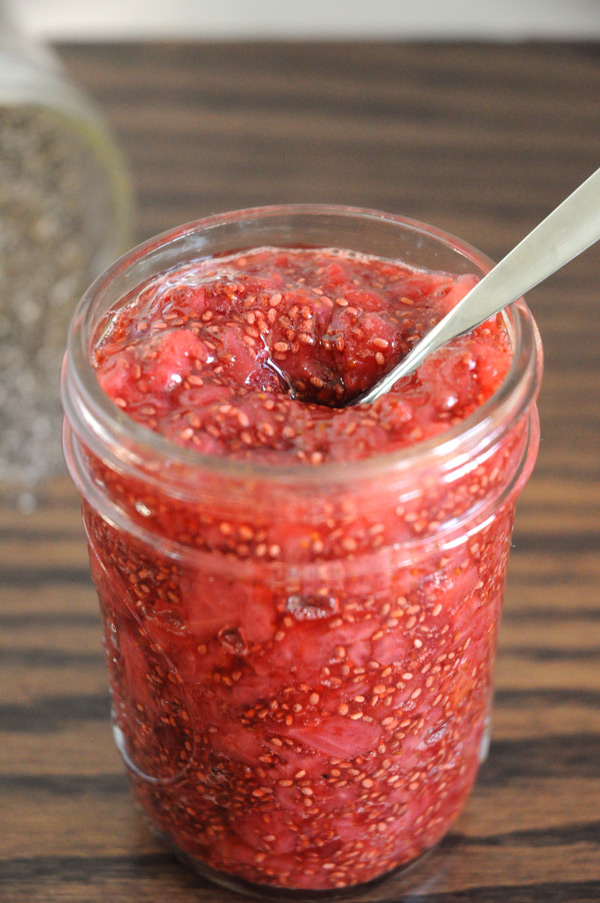
  • Fruit of choice (I used 1 pound of strawberries)
  • ¼ cup maple syrup or agave (I used maple syrup)
  • 2 tbsp chia seeds
Instructions
  1. Prepare your fruit. For my strawberries, I washed them, hulled them, and cut them into really small pieces. I've also made blueberry chia seed jam, and for those, I just washed the blueberries.
  2. Add your fruit and maple syrup or agave to a small pot, and heat on medium for about 10 minutes, or until the fruit starts to liquefy. Once this happens, start to gently smash your fruit. The smoother you want your jam, the more you'll have to mash up the fruit.
  3. Once the fruit has reached your desired consistency, bring it to a boil, and allow to cook for about 5 minutes.
  4. Add in your chia seeds and stir to combine. Remove from heat and then walk away and come back in 10 minutes - voila, homemade jam!
  5. Allow the jam to cool completely before serving. Store in the refrigerator for up to 2 weeks.
3.2.2704


Filed Under: How-to Guides Tagged With: gluten free, oil free, quick and easy, soy free, tips and tricks

8 Ways to Add More Beans to Your Diet

May 23, 2014 8 Comments

Beans are so much more than just a meat substitute. They are so nutritious that everyone should be eating a ton of them, and not just vegans. Everyone.

Lots-of-Beans

Here are some interesting facts about beans:

  • Beans are comparable to meat when it comes to calories.
  • Beans make you feel fuller, faster, because of their high fiber and water content.
  • Beans are high in antioxidants, a class of phytochemicals that incapacitate cell-damaging free radicals in the body (free radicals have been implicated in everything from aging, cancer, Parkinson’s and Alzheimer’s).
  • Beans have an extremely low glycemic index (which means you would get less than half the blood sugar spike from eating beans than if you ate the same amount of carbs in the form of bread, potatoes or pasta).

Beans

kidney-beans

Canned vs. Dry
Canned are convenient, but can be loaded with salt. Choose a low-sodium variety if you can. Make sure to rinse and dry your beans well if buying canned. This will help remove a lot of the salt (but not all of it). It will also prevent your beans from getting too soggy in your recipe.

Dried beans are a bit more work (soak 8 hours, then cook for 30-60 minutes), but the benefits are that there is no added salt, they’re much more inexpensive than canned beans, and they have zero traces of the plastic chemical BPA. I also personally find that dried beans taste a thousand times better than canned beans (I think canned beans are more “mushy”).

8 Ways to Add More Beans to Your Diet

More-Beans

1. Incorporate beans into your favourite meals, especially Mexican dishes like burritos and tacos.

2. Add beans to soups and stews. This is an easy way to “sneak” more beans into your diet. I love making a vegetable soup with black beans and chickpeas, and I’ve also had some really tasty white bean soups.

3. Eat more hummus. Who doesn’t love a bowl of hummus and some fresh veggies and pita slices? This protein-packed snack is super simple to make! You don’t just have to use chickpeas though. I’ve had some yummy hummus made from black beans and also white beans! Hummus is not just for dipping, either. Enjoy it in salads and spread it on tortillas and sandwiches!

4. Throw them in your salads. Adding beans to your salad will give you much more protein than any veggies you could throw in there, and it will fill you up faster and keep you fuller longer, too. I love putting chickpeas in my salads!

5. Roast some chickpeas. Stick them in the oven with a touch of oil and some spices (I like adding a splash of vinegar and some salt!) and bake until they are golden and crispy. This is a healthy snack that is easy and full of protein!

6. Add them to chilis. Instead of just using the usual red kidney beans, try to add a variety of beans to your chilis. I often add black beans and chickpeas to mine, but I’ve also started making a white bean chili with lots of different white beans, which is delicious, too!

7. Add them to tomato sauce. The next time you make up a batch of tomato sauce for your pasta, throw in some beans for added fiber and protein!

8. Make bean desserts! One of my secrets for getting my young kids to eat more beans is to hide them in desserts. Black bean brownies are their favourite! I also make chickpea chocolate chip cookies and chocolate cake made with red kidney beans!

Beans-in-Your-Diet

How do you like to eat your beans?

Filed Under: How-to Guides Tagged With: beans and legumes, tips and tricks

How Long Does Fresh Produce Last + How Do I Store It?

May 13, 2014 4 Comments

When you eat a healthy vegan diet, it’s very common to have a refrigerator (and counter!) completely filled with fresh produce. This is a good thing.

The bad thing is that if you’re not careful in how you plan your meals, your produce can go bad on you in a short period of time. Since produce is fresh food, and not the processed crap you find on store shelves, it doesn’t last for months on end. Some produce lasts longer than others, while some will spoil soon after you purchase it.

Since I know this can be confusing (it was confusing to me just a few months ago!), I thought I’d make up this list to show you how long produce lasts. Note: These numbers are based on the date that you purchased the produce, assuming that the items you purchased are in excellent health and have not yet started to spoil.

Fresh Produce

Up to 3 days:

  • Artichokes – Store them in an air-tight plastic bag in the refrigerator.
  • Asparagus – Store them in the refrigerator in an upright jar, filled with 1-1 1/2 inches of water.
  • Avocados – Store them at room temperature, but avoid direct sunlight.
  • Beans – Store them in an air-tight plastic bag in the refrigerator.
  • Bok Choy – Store it in an air-tight plastic bag in the refrigerator.
  • Cherries – Store them in an air-tight plastic bag in the refrigerator.
  • Corn – Leave husks on corn on the cob and store uncovered in the refrigerator.
  • Delicate Herbs (Basil, Cilantro) – Store them in the refrigerator, in an air-tight plastic bag with a piece or two of paper towels in there with the herbs.
  • Mustard Greens – Store them in an air-tight plastic bag in the refrigerator.
  • Okra – Store it in an air-tight plastic bag in the refrigerator.
  • Peaches – Store them at room temperature.
  • Pineapple – Store it at room temperature to ripen, then refrigerate for 3-5 days. Cut up pineapple will last 3-4 days in the refrigerator.
  • Raspberries – Discard bruised or moldy berries before storing. Store in the refrigerator (top shelf), in a shallow container, covered with plastic wrap.
  • Strawberries – Discard bruised or moldy berries before storing. Store in the refrigerator (top shelf), in a shallow container, covered with plastic wrap.

Berries-Avocados

Up to 5 days:

  • Bananas (once ripe, they can last another 5 days in the refrigerator, just keep in mind that the skin will turn black) – Store at room temperature until ripe, then refrigerate, if needed.
  • Blackberries – Discard bruised or moldy berries before storing. Store in the refrigerator (top shelf), in a shallow container, covered with plastic wrap.
  • Cantaloupe (once ripe, they can last another 7-10 days in the refrigerator) – Store at room temperature until ripe, then refrigerate if needed. Once cut, cantaloupe lasts 3-4 days in the refrigerator.
  • Collard Greens – Store them in an air-tight plastic bag in the refrigerator.
  • Eggplant – Store it in the refrigerator, wrapped in plastic.
  • Green Onions – Wrap in plastic and store in the vegetable crisper of your refrigerator.
  • Honeydew Melon (once ripe, they can last another 5-7 days in the refrigerator) – Store at room temperature until ripe, then refrigerate if needed .Once cut, honeydew melon lasts 3-4 days in the refrigerator.
  • Kale – Store it in an air-tight plastic bag in the refrigerator.
  • Kumquats – Store them room temperature.
  • Leafy Herbs (Mint, Parsley) – Store them in the refrigerator, in an air-tight plastic bag with a piece or two of paper towels in there with the herbs.
  • Lettuce – Store it in the refrigerator in a loosely-closed plastic bag.
  • Mangoes – Store them at room temperature.
  • Mushrooms – Store them in a paper bag in the refrigerator.
  • Papaya – Store it at room temperature.
  • Persimmons – Store them at room temperature.
  • Radishes – Store them in an air-tight plastic bag in the refrigerator.
  • Swiss Chard – Store it in a loosely-closed plastic bag in the refrigerator.
  • Tomatoes – Store them at room temperature until ripe, then refrigerate for 2-3 days if needed.
  • Zucchini – Store in a loosely-closed plastic bag in the refrigerator.

Lettuce-Green-Onions

Up to 1 week:

  • Blueberries – Discard bruised or moldy berries before storing. Store in the refrigerator (top shelf), in a shallow container, covered with plastic wrap.
  • Clementines – Store them at room temperature.
  • Cucumber – Store it in an air-tight plastic bag in the refrigerator.
  • Grapefruit – Store it at room temperature.
  • Jalapeno – Store in a paper bag in the vegetable crisper of your refrigerator.
  • Kiwi – Store them at room temperature.
  • Oranges – Store them at room temperature.
  • Pears – Store them at room temperature.
  • Plums – Store them at room temperature.
  • Spinach – Store it in a loosely-closed plastic bag in the refrigerator.
  • Watermelon – Store it at room temperature.

Pears-Spinach

1 week or more:

  • Apples – Store them in the vegetable crisper refrigerator for up to 3 weeks.
  • Beets – Store them in a loosely-closed plastic bag in the refrigerator for up to 2 weeks.
  • Bell Peppers – Store them in an air-tight plastic bag in the refrigerator for up to 2 weeks.
  • Broccoli – Store it in a loosely closed plastic bag in the refrigerator.
  • Brussels Sprouts – Store them in a loosely closed plastic bag in the refrigerator.
  • Butternut/Acorn/Spaghetti Squash – Store it at room temperature (in a dark, cool area of 50F-60F) for up to 4 weeks.
  • Cabbage – Store it in a loosely closed plastic bag in the refrigerator.
  • Carrots – Store them in a loosely closed plastic bag in the refrigerator for up to 3 weeks.
  • Cauliflower – Store it in a loosely closed plastic bag in the refrigerator.
  • Celery – Wrap it tightly with aluminum foil and store  it in the refrigerator for up to 3 weeks.
  • Garlic – Store it in a cool, dark area for up to 2 months.
  • Leeks – Store them in a paper bag in your refrigerator.
  • Lemons – Store them in an air-tight plastic bag in the refrigerator for up to 2 weeks.
  • Limes – Store them in an air-tight plastic bag in the refrigerator for up to 2 weeks.
  • Onions (Except Sweet) – Store them in a cool, dark area for up to 2 months.
  • Parsnips – Store them in an air-tight plastic bag in the refrigerator for up to 3 weeks.
  • Pomegranates – Store them at room temperature for up to 2 weeks.
  • Pumpkin – Store it in a cool, dark area for up to 4 weeks.
  • Russet Potatoes – Store them in a cool, dark area for up to 2 weeks.
  • Sweet Potatoes – Store them at room temperature.
  • Turnips – Store them in an air-tight plastic bag in the refrigerator.
  • Woody Herbs (Rosemary) – Store them in the refrigerator, in an air-tight plastic bag with a piece or two of paper towels in there with the herbs.

Lemons-Pepper

I think I’ve covered all of the common produce here, but if I’ve missed something, please let me know and I will add it to the list!

Filed Under: How-to Guides Tagged With: groceries, tips and tricks

How to Make Vegan Ricotta Cheese

April 21, 2014 25 Comments

Vegan Ricotta

Oh a whim, I decided to make lasagna last week. It was a cold, dreary day, and I was seriously craving some comfort food – and lasagna is my comfort food of choice!

The only thing standing in my way of a delicious pan of hot lasagna was that I didn’t have any cheese to use. I only had a bit of Daiya shreds left (and I don’t like to eat much processed food, so I keep my Daiya consumption to a minimum, even though it’s delicious!), so that wouldn’t work.

After a bit of pondering, I figured I’d make my vegan ricotta cheese to spread throughout the lasagna. Thankfully, I had already soaked some cashews early that morning to use for something at lunch, which I never ended up making, so I used those cashews to make the cheese.

Ricotta-Vegan

It came together so easily, and in no time flat. After making this in my food processor, I scooped the ricotta into an air-tight container and let it sit in the fridge for about 20 minutes, while I prepared the lasagna noodles and marinara sauce. This gave the ricotta ingredients a bit more time to marinate.

This cheese spreads on lasagna very well, but – it’s not just for lasagna! Use this ricotta as a dip, spread on crackers, or even add a dollop to your salad. It’s very versatile. Any way you choose to eat it, this cheese is incredible!

Vegan Ricotta Cheese

Vegan Ricotta Cheese
 
Print
Prep time
10 mins
Total time
10 mins
 
Use this vegan ricotta cheese in lasagna and pastas, as a dip, spread on crackers, or even in your salad. It's very versatile!
Author: Vegan Insanity
Recipe type: Vegan Cheese
Serves: Just over 2 cups
Ingredients
  • 2 cups raw cashews, soaked for at least 2 hours, then drained
  • 2 garlic cloves
  • 3 tbsp lemon juice
  • ¼ cup plain non-dairy milk (I used soy)
  • 1 tbsp maple syrup
  • 1½ tbsp extra virgin olive oil
  • ½ tbsp dried basil
  • ⅓ cup fresh chives
  • 1 tsp freshly ground black pepper
  • ½ tsp salt
Instructions
  1. Add soaked cashews, garlic, emon juice, non-dairy milk, maple syrup, oil, basil, and chives to your food processor.
  2. Process until smooth, scraping down the sides as necessary. If your ricotta is too dry, add a bit more non-dairy milk. It took me about 5 minutes to process my cheese until it was smooth enough for me.
  3. Season with salt & pepper, to taste.
Notes
*You can easily change up the herbs in this recipe to suit your liking.
*You can use agave instead of maple syrup.
*You can use apple cider vinegar instead of lemon juice.
3.2.2310


Filed Under: How-to Guides Tagged With: gluten free, raw

  • « Previous Page
  • 1
  • 2

I'm Cassie - vegan food lover and animal rights activist. I live in Vaughan, Ontario, right near Toronto, with my husband, our 2 kids, 3 cats, and a dog that thinks he's a cat, too. I love to cook and share delicious vegan food with everyone I know. MORE →


Top 10 Posts

  • Super Simple Vegan Pad Thai
  • Vegan Cauliflower Mac & Cheese
  • Vegan Veggie & Black Bean Enchiladas
  • Zucchini Fritters with Vegan Sour Cream
  • How to Make Vegan Ricotta Cheese
  • 30 Tasty Vegan Lunch Ideas
  • 3 Ingredient Vegan Gnocchi
  • Best Ever Vegan Fried Rice with Scrambled Tofu
  • Quinoa & Chickpea Tabbouleh Salad
  • 20 Delicious Vegan Dinner Ideas
Top 10 Vegan Cookbooks

©2014 Mrs January Inc | All Rights Reserved | Privacy Policy


I ♥ the Genesis Framework