Vegan Recipes from Cassie Howard

Vegan Insanity >> Vegan recipes that are delicious and easy to make. Plus, kitchen, cooking & shopping tips!

  • Home
  • About
    • Inside My Vegan Pantry
    • My 1 Year Vegan Anniversary
    • How I Got Over My Cheese Addiction
  • Recipes
    • Breakfast
    • Lunch
    • Dinner
    • Dessert
    • Snacks/Appetizers
  • Resources
    • Is it Expensive to be Vegan?
    • Top 10 Kitchen Tools
    • Top 10 Cookbooks
    • Vegan Picks
    • How-to Guides
    • Cooking Tips
    • Recipe Ideas
  • Contact

Is It Expensive to be Vegan?

October 6, 2014 5 Comments

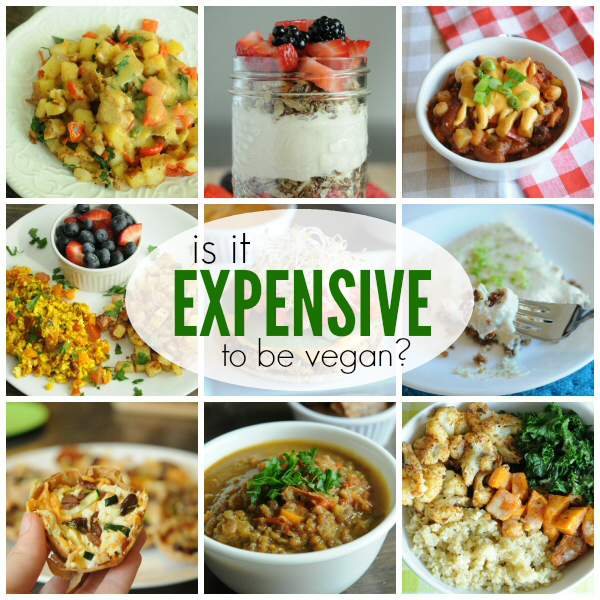
One question that I am often asked is:

“Is it expensive to be vegan?”

Today, I’m going to open that can of worms and let you know the answer.

Being vegan can be cheap or expensive or right in the middle. It depends on a lot of things: your financial situation, your personal feelings, and your access to certain foods.

Expensive to be Vegan

Am I personally spending more money now than when I was eating a diet filled with animal products?

Yes, I am. On purpose.

On purpose, you ask? Why on earth would I possibly want to spend more money on my grocery bill each month when I don’t have to?

Well, here’s the thing: once I switched to a vegan diet, I learned more and more not just about vegan food, but about food in general. I read about GMO’s, artificial colours and flavourings, preservatives, and all of that junk that is put into our food and beverages these days.

I wanted to learn everything I could about food. Where it came from, how it got here, and anything else I could find out.

What I learned was scary. Most everything I ate was either highly processed and/or loaded with chemicals. I switched to a vegan diet to be healthy, and more than half of the stuff I ate was not healthy at all.

So, I made a drastic change. I switched to a mostly whole foods diet and the majority of the fruits and veggies that I buy are organic. No one wants to eat chemicals for breakfast, right? I know I sure don’t. So, organics it is.

Vegan-Groceries-July-2014

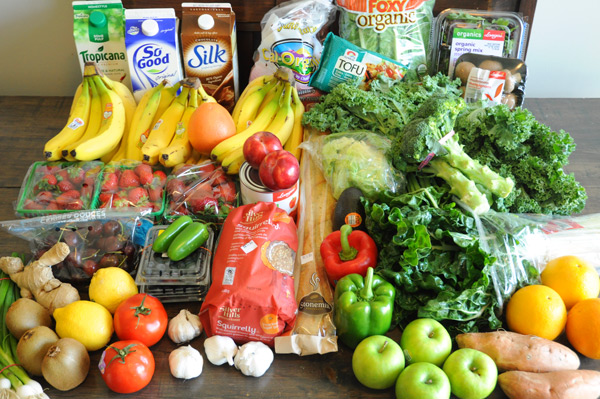
Sometimes, when money is tight, I will only buy the dirty dozen organic, and conventional for everything else, but that doesn’t happen often, because I make it a priority to have money set aside for high-quality produce.

Speaking of high-quality produce, I stopped shopping at low-end grocery stores, not because of the prices, but because of the quality. I wouldn’t say I shop at high-end grocery stores these days (not often, anyway!), but I do avoid stores that, from my own personal experience, sell mediocre (or less) produce.

Switching to a vegan diet made me change my overall eating habits. It wasn’t just eliminating the animal products, it was learning all about food and how food is made, that really changed the way I grocery shopped.

So yes, I spend more money on groceries now that I eat a vegan diet.

But does that mean you have to? Absolutely not! There are many ways you can save money on a vegan diet.

Pastas

Here are 7 of my tips:

1. Shop at farmer’s markets

Especially at the very end of the day, when the farmer’s a ready to close up shop. You won’t get the best selection, but you will certainly get the best price, because the farmer doesn’t want to have to lug all of that food back to the farm. Ask for a discount, and you’ll likely get one.

2. Only buy the sale items

Regardless of where you shop, all stores have a sales cycle, and they will always have items on sale when you are shopping. Take advantage of those sales and add them to your menu plan. Try to avoid purchasing items that aren’t on sale. They just might be on sale next week!
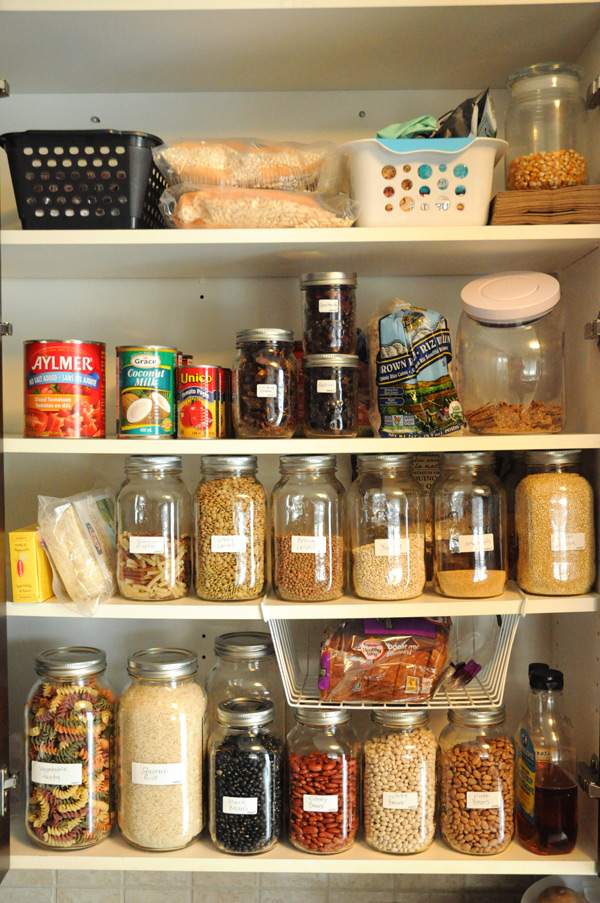
3. Stock up

Stocking up on produce when it’s on sale is a great way to save money. For example, if berries are on sale super cheap, buy enough to last you a few months (if you can afford to do so), and stash them in the freezer. The same goes for other fruit, and for vegetables.

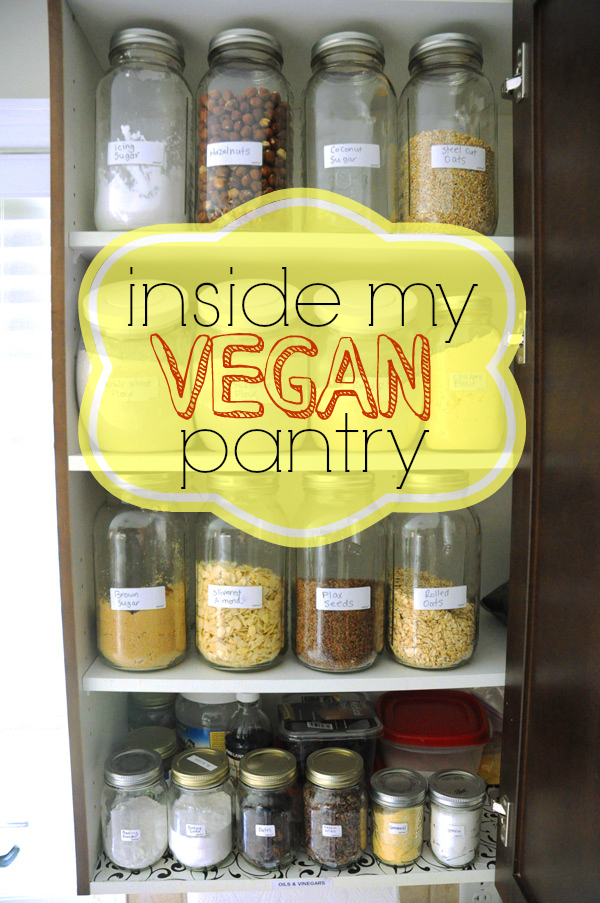
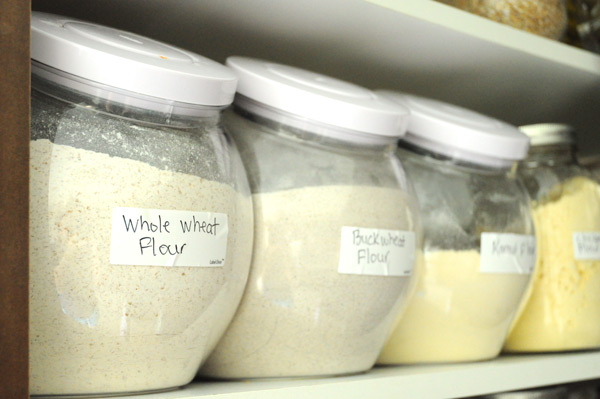
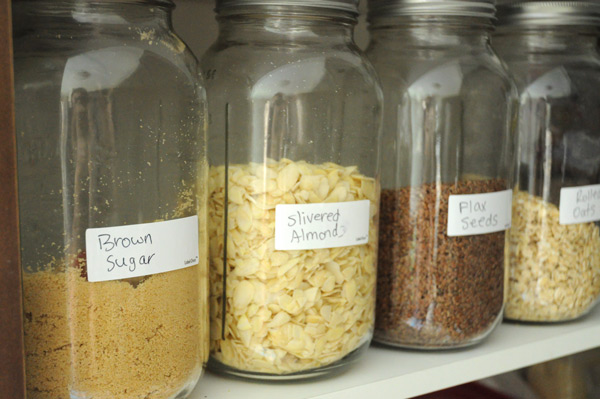
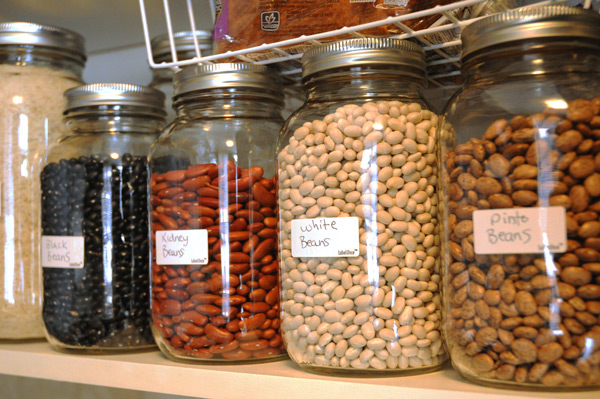
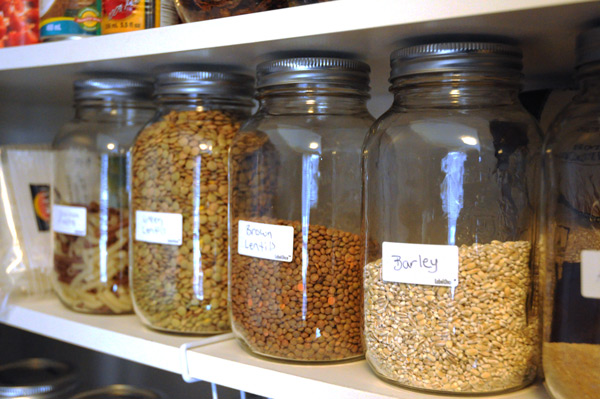
You should do this with other produce as well, such as beans, rice, quinoa, flour, and other pantry staples.

4. Look for “bad” produce

Many grocery stores have a shelf or cart where they put produce that no one will buy because it looks ugly. For example, spotty bananas are almost always available (people don’t know that spotty bananas are the most perfect!), peppers that are a bit soft, apples that have a small bruise or two. Buy these items and either eat them right away or store them in the freezer for great savings!

5. Buy the dirty dozen

If you can’t afford to buy all organics, try to at least buy the “dirty dozen” organic, and the rest conventional.

The dirty dozen are 12 produce items that have the highest amount of pesticide residues:

  1. Apples
  2. Strawberries
  3. Grapes
  4. Celery
  5. Peaches & Nectarines (Imported Nectarines)
  6. Spinach
  7. Sweet Bell Peppers & Hot Peppers
  8. Cucumber
  9. Snap Peas – Imported
  10. Cherry Tomatoes
  11. Potatoes
  12. Kale & Collard Greens

6. Shop in season

This goes hand in hand with only buying things that are on sale, because the items on sale are likely the items that are in season.

When you only buy produce that is in season, it’s not only cheaper, but it tastes a thousand times better, too!

7. Plan your menus

Menu planning is essential if you want to save money on groceries – vegan or not. Plan your meals for an entire week, shop for groceries once, and you will save money, and also have a plan of attack for the week ahead. This will save you time, and the stress of “what’s for dinner” that many people experience each day.

I personally plan all of my meals – including breakfast, lunch, dinner, and snacks/desserts. You may find that too overwhelming. If that’s the case, start with just one meal. Dinner is the most stressful for most people, so I would start there. You can add in more meals later, if you are up for the challenge.

Don’t automatically assume that switching to a vegan diet is more expensive, because it doesn’t have to be. For me, it is, but like I said before, that is by choice. I pay more for better quality food, and I’m okay with that.

If you’re toying with the idea of going vegan, but are scared about the expense – don’t be! Start small and make gradual changes in your diet, and see where that takes you. You might be surprised just how inexpensive being vegan can be.

If you’re currently eating a vegan diet, do you find it to be more expensive than a diet full of animal-foods?

Filed Under: How-to Guides Tagged With: reading, tips and tricks

How I Got Over My Cheese Addiction

September 29, 2014 25 Comments

Are you (or were you) addicted to cheese? Does giving up cheese scare the pants off of you? Sure, vegan food is delicious, but there is no way, no how that you could give up cheese. Right?

If this sounds like  you, I can relate. My addiction to cheese was real, and eliminating it from my diet was the last thing I wanted to do, ever.

Cheese Addiction

Cheese was my favourite. I loved parmesan cheese on pretty much everything, loads of mozzarella on pizza and pasta, cheddar on tacos and burritos, ricotta in lasagna, feta directly from the container into my mouth… I loved cheese. Couldn’t get enough of it. I’d say in an average month, I spent over $20 on cheese.

And then I switched to a vegan diet and cheese was no longer a part of my daily life.

Vegan Ricotta Cheese

It was hard. So, so incredibly hard. I was so addicted to the stuff that it was all I could think about. At every meal, I though “this could use some cheese” and “this is good, but it would be better with cheese”.  After about a week into my new diet, I seriously contemplated being vegetarian instead, just so I could get my daily dose of cheese again.

But I persevered. I kept going. Because of all the things that are bad for you, cheese (dairy) is one of the absolute worst. Plus, the animals! Those poor animals. After watching a few documentaries by that point, I still couldn’t get the images of suffering cows out of my head. I couldn’t do it. I couldn’t go back to cheese.

I remember getting on my computer and looking for a solution. Some support. Someone who would comfort me and tell me that everything was going to be okay.

While I didn’t find exactly that, what I did find was that I was not alone. Apparently, giving up cheese is the most common issue for new vegans (and is the main reason why many people won’t actually switch to a vegan diet at all). I stumbled upon one blog post: I couldn’t give up cheese, so I gave up animal cruelty instead. And it changed my life. I thought I knew how cruel cows were treated, but I was wrong. This blog post scarred me, but in a good way. I’ve never looked at cheese the same way again.

Homemade-Vegan-Parmesan-Cheese

Not only is cheese bad for you, but it’s cruel. That’s enough for me to walk away from it.

After going through cheese withdrawl for about 2 weeks, I finally started to crave it less and less. To help me with the transition, I started trying the vegan cheeses that were on the market. Some of my favourites:

  • Daiya Cheese Shreds (Mozzarella and Cheddar were always in my fridge)
  • Daiya Cream Cheese (I often used plain for baking and chive & onion for my bagels)
  • Tofutti Cream Cheese (I prefer Daiya, but Tofutti was a great substitute when I couldn’t find Daiya)
  • Daiya Cheese Slices (I always bought cheddar and used them to make grilled cheese – my kids loved them, too!)

Vegan Cheese Daiya

I also started experimenting with my own, homemade cheese recipes, like this vegan nacho cheese sauce (that I seriously put on just about everything), this vegan ricotta cheese, and this homemade vegan parmesan cheese (I put this on everything, too – you can always find a jar full of this cheese in my fridge!).

I purchased this cookbook, The Non-Dairy Evolution Cookbook: A Modernist Culinary Approach to Plant-Based, Dairy Free Foods, by Skye Michael Conroy, a few months ago, and have since made Chunky Bleu Cheese Dressing, Extra-Sharp White Cheddar, Cream Cheese, Sharp Tofu Cheddar and Pepper Jack Cheese. All were incredible and all will be made again and again!

I’ve learned that vegan cheese can taste just as good (if not better) than the stuff made with animal products. Not only is it often tastier, but it’s much healthier and doesn’t promote any cruelty. I call that a win-win!

So if you’re struggling with giving up cheese, remember – that overwhelming desire to call it quits and just shove a brick of cheese in your mouth – it will pass. If you’re as addicted to cheese as I was, it will be hard, you’ll be cranky, and you’ll think you’re going crazy – but you’re not. You’ll be fine.

If I can give up cheese (and I ate cheese pretty much every single day for years), you can too! And you’ll be better off without it.

Spicy-Mac-and-Cheese

I now live my life completely dairy-free, and I no longer have any desire to eat cheese made from cow’s milk. With all of the vegan cheese available on the market, and all of the delicious cheese recipes I can make at home (many of them are super easy!), there’s no need for me to eat cheese ever again.

No more suffering animals, no more putting garbage in my body, and no more being addicted to something that was unhealthy. I’m better off without it, and you will be, too.

Do you have problems giving up cheese? Or, if you’ve already done it, was cheese a big hurdle for you?

Filed Under: How-to Guides Tagged With: reading, tips and tricks

How to Make Homemade Almond Milk

September 1, 2014 3 Comments

Homemade-Almond-Milk

Homemade almond milk. Is there anything better?

The correct answer is yes. Chocolate. But other than chocolate? NOPE!

And guess what? Homemade almond milk is one of the easiest things you can make yourself! No more processed milk from the store, for you. Yippie!

Plump-Almonds

First, start off with a bowl of delicious, plump almonds. To get them nice and plump like this, soak them in water overnight, or at least 8 hours.

Soaking your almonds allows you to get the almond milk smoother. Plus, soaked almonds are easier to digest! So go get soaking!

Almonds-in-Blender

Add your soaked nuts to a blender with 4 cups of filtered water. Blend for about 3 minutes, or until smooth, and white, and creamy, and omgosh so good.

Almond-Milk-in-Blender

Like this. Pretty, right? Yes – milk can be pretty. Especially this almond milk.

See how well the blender was able to do with the soaked almonds?

Pouring-Almond-Milk

Although the mixture is smooth, you still want to pour the milk through a nut milk bag to remove any sediment. I use this one that I bought off Amazon for under $10. Worth. Every. Penny.

Squeezing-Almond-Milk

Squeeze, squeeze, and squeeze some more, until no more milk is seeping through the bag. Set aside the almond pulp that is left inside the bag (refrigerate and use in smoothies or dry it out in the oven to make almond flour).

Add the milk back to the blender and add the agave, vanilla and cinnamon. Blend for another minute or so.

Almond-Milk-Homemade

Ta-da! Homemade almond milk in minutes (not including soaking time)! I told you it was easy. Pour into a large air-tight jar and refrigerate for up to 5 days.

And in case you were wondering – YES, it is delicious. I like it 1000x more than the store-bought stuff.

Next up on my list – homemade chocolate almond milk!

Vegan-Almond-Milk

How to Make Homemade Almond Milk
Recipe Type: Homemade Milk
Author: Vegan Insanity
Prep time: 15 mins
Total time: 15 mins
Serves: 8 cups
Ingredients
  • 1 cup raw almonds, soaked for at least 8 hours
  • 4 cups filtered water
  • 1 tbsp agave
  • 1/2 tsp vanilla
  • 1/4 tsp cinnamon
  • 1/4 tsp salt
Instructions
  1. Drain and rinse your almonds, then add to a blender with 4 cups of water.
  2. Blend for about 3 minutes, or until smooth.
  3. Over a large bowl, place a nut milk bag, and then pour the almond & water mixture through the nut milk bag.
  4. Gently squeeze the bottom of the nut milk bag, releasing the almond milk into the bowl. Keep doing this until all of the milk has been released and you are left with a big lump of almond pulp in the bag (set that aside and use in smoothies or dry it out in the oven to make almond flour).
  5. Rinse out your blender and blender lid, and add the almond milk back into the blender, along with the agave, vanilla and cinnamon. Blend again for another minute or so.
  6. Pour almond milk into a large glass jar and refrigerate for up to 5 days.
Notes
*Make sure you shake up the almond milk before using, as it will separate while sitting.
3.2.2708


Filed Under: How-to Guides Tagged With: gluten free, oil free, quick and easy, raw, soy free

Homemade Croutons in 20 Minutes

August 12, 2014 1 Comment

Vegan-Croutons

Do you ever wander the aisles in the grocery store and come across items where you think – “people actually buy this?”. I do. A lot. But that’s probably because I make pretty much everything from scratch and it’s weird to me when I realize other people don’t do that too.

Cause’ homemade is the way to go, people. There’s nothing better!

Homemade-Croutons

If there’s one item in the grocery store that is absolutely and utterly pointless, it’s croutons. Actually, bread crumbs too. These are the EASIEST things to make yourself. So, so easy. Even a 5 year old can make these croutons (and mine has – supervised, of course!).

In just 20 minutes (or less!), you can have your own batch of homemade croutons to serve with salads. Or you can be like me and just eat them on their own, as a snack. Only cool people eat croutons as a snack.

Homemade Croutons in 20 Minutes
Recipe Type: How-To Guide
Author: Vegan Insanity
Prep time: 5 mins
Cook time: 15 mins
Total time: 20 mins
Serves: 4-6
Ingredients
  • 1 loaf day-old French bread
  • 1/4 cup olive oil
  • 1 tsp garlic powder
  • 1 tsp basil (optional)
Instructions
  1. Preheat oven to 375F.
  2. Chop bread into cubes. Make sure they’re bite-sized!
  3. Add bread cubes, olive oil, garlic powder and basil into a large bowl. Mix well, so that all bread cubes are coated nicely.
  4. Arrange bread cubes on a baking tray, lined with non-stick spray or a [url href=”http://www.amazon.com/gp/product/B00629K4YK/ref=as_li_tl?ie=UTF8&camp=1789&creative=390957&creativeASIN=B00629K4YK&linkCode=as2&tag=mrsjan-20″ target=”_blank” title=”Baking Mat”]Silplat baking mat[/url]. Bake for 10-15 minutes, or until firm to the touch and lightly browned.
  5. Allow to cool completely, then stick them in a freezer bag and pop in the freezer until needed. Thaw for 5 minutes before use.
3.2.2708


Filed Under: How-to Guides Tagged With: nut-free, quick and easy, soy free, tips and tricks

Inside My Vegan Pantry

July 16, 2014 13 Comments

Many new vegans email me and ask what I keep in my vegan pantry, so I thought I should post some photos and details of the food that I keep on hand at all times. These are the foods, spices and baking items that I always have in my kitchen because I use them so often.

Building a vegan pantry takes time, money, and patience, so if you’re new to vegan eating, try to take things slow. It can be a bit overwhelming otherwise!

Inside My Vegan Pantry

Vegan-Pantry

Flours

  • Whole Wheat Flour
  • Buckwheat Flour
  • Kamut Flour
  • Chickpea Flour
  • Spelt Flour
  • Almond Meal/Almond Flour
  • Oat Flour

Flours

Sweeteners

  • Brown Sugar
  • Coconut Sugar
  • Agave
  • Maple Syrup
  • Stevia
  • Icing Sugar
  • Medjool Dates

Baking-Sugar

Nuts

  • Hazelnuts
  • Almonds
  • Slivered Almonds
  • Walnuts
  • Cashews
  • Peanuts

Icing-Sugar

Seeds

  • Chia Seeds
  • Poppy Seeds
  • Pumpkin Seeds
  • Flax Seeds
  • Sesame Seeds
  • Sunflower Seeds
  • Hemp Seeds

Vegan-Pantry-Cupboard

Baking

  • Baking Powder
  • Baking Soda
  • Cacao Nibs
  • Chocolate Chips (Enjoy Life Brand)
  • Blackstrap Molasses
  • Dry Active Yeast
  • Coconut
  • Carob Powder
  • Cocoa Powder
  • Coconut Milk

Baking

Cooking

  • Rolled Oats
  • Steel Cut Oats
  • Cornmeal
  • Kosher Salt
  • Pink Salt
  • Cornstarch
  • Dry Active Yeast
  • Fresh Garlic
  • Fresh Onions
  • Nutritional Yeast
  • Sun-Dried Tomatoes
  • Coconut Milk
  • Canned Tomatoes (Crushed & Diced)
  • Tomato Paste
  • Vegetable Broth
  • Tamari
  • Soy Sauce

Spice-Cupboard

Oils

  • Coconut Oil
  • Pumpkin Seed Oil
  • Flax Oil
  • Extra Virgin Olive Oil
  • Hemp Oil
  • Sesame Oil
  • Earth Balance Vegan Butter

Vinegars

  • Balsamic Vinegar
  • White Vinegar
  • Red Wine Vinegar
  • Rice Vinegar
  • Apple Cider Vinegar

Spices

  • Garlic Powder
  • Onion Powder
  • Cinnamon
  • Turmeric
  • Peppercorns
  • Basil
  • Paprika
  • Dill
  • Cumin
  • Coriander
  • Bay Leaves
  • Ginger
  • Curry Powder
  • Oregano
  • Chili Powder (Homemade)
  • Nutmeg
  • Thyme

Spices

Beans/Legumes

  • Kidney Beans
  • Black Beans
  • Chickpeas (Garbanzo Beans)
  • White Beans
  • Pinto Beans
  • Red Lentils
  • Brown Lentils
  • Green Lentils

Pantry-Beans

Grains & Bread

  • Brown Rice
  • Basmati Rice
  • Couscous (Usually Pearl Couscous)
  • Pasta (Vegetable, Rice, Flax, Quinoa & Whole Wheat)
  • Amaranth
  • Millet
  • Quinoa (Red & White) *not really a grain, but many people consider it one, so I put it here!)
  • Pearled Barley
  • Buckwheat Groats *not really a grain, but many people consider it one, so I put it here!)
  • Silver Hills Bread & Bagels

Barley

Snacks

  • Popcorn Kernels
  • Lundberg Rice Cakes
  • Cranberries
  • Raisins
  • Mary’s Gone Crackers
  • Nice & Natural Granola Bars
  • Giddy Yoyo Chocolate Bars

Food-Cupboard

And I think that just about covers it! Of course, I am trying new foods all the time, and if I like them enough (and my family does, too!), they become a regular staple in my diet. When that happens in the future, I will be sure to update this list!

What are some of your must-have vegan pantry items?

Filed Under: How-to Guides Tagged With: groceries, reading, tips and tricks

Top 10 Kitchen Tools That I Use Daily

July 9, 2014 5 Comments

When it comes to kitchen tools, there are a ton of them out there, but most are unnecessary. I’ve purchased my fair share of kitchen gadgets, and most of them ended up in the trash or donated, simply because they didn’t work as advertised, or because I never used them.

Today, I’m going to share with you 10 kitchen tools that do work, and that are definitely worth the money. I use these items every day!

Top Kitchen Tools

Top 10 Kitchen Tools That I Use Daily

Paderno Set

1. Paderno Cookware Set – My husband and I received a set of Paderno cookware for Christmas a few years ago, and now – it’s pretty much all I use. I LOVE it. I actually burned one of the pots by mistake one time, and willingly paid the $80 for a replacement, because I love them that much.

Our set included a small pot, medium pot, large pot with steamer basket and an extra large pot, which is what I usually use for spaghetti or linguine. Our set also included a non-stick fry pan.

I truly believe that Paderno cookware is the best! I’m a loyal customer (I even bought a set for my mom for Christmas last year and she loves Paderno now, too!).

Silplat Mat

2. Siplat Non-Stick Baking Mat – I was introduced to these amazing mats last year and I am shocked by how much I use it! I don’t just use it for baking, but for cooking as well.

These mats were designed to prevent sticking when baking in the oven, especially for things like fruit leathers and really thin cookies, but I use them for pretty much everything. Roasted potatoes, croissants and it even works great on your counter top when you’re rolling out dough. I love my Silplat baking mat so much. I only wish I’d known about it sooner!

Paring Knives

3. Kuhn Rikon Non-Stick Paring Knives – Another item that’s used daily in my kitchen is paring knives, and these knives from Kuhn Rikon are magical.

Whether I’m cutting up small fruits and veggies, or slicing pastries into smaller pieces, these knives are super sharp and always work well. I’ve had my set for over 3 years now and haven’t had a single problem.

In the past, paring knives would always dull out really quick, or they would stick to the food I was trying to cut, but these paring knives from Kuhn Rikon don’t do that at all. They’re my favourite knives for small jobs!

Cutting Boards

4. Plastic Cutting Boards – As much as I do love my big bamboo chopping board, I use plastic cutting boards for most kitchen jobs, and these are my favourite.

The best part is the little groove that they have, which collects juices from fruit and other things, when you’re cutting. With previous cutting boards, the juice would drip right off the board and onto my counter, leaving a big mess for me to clean up. Not these cutting boards, though!

They also don’t slide around on my counter when I’m using them, which is an added bonus!

Wooden Spoon

5. Harold Imports Wooden Spoon – I bought this spoon when I was vacationing in Florida one year (I know, on vacation I’m buying kitchen tools! I’m a bit obsessed!) and haven’t looked back.

I used to be a big fan of thos cheap, plastic spoons from the dollar store, but once they started peeling, I looked for an alternative. A friend recommended wooden spoons, so when I saw one for just $10, I snatched it up before I could change my mind. Now, I can’t imagine doing my daily cooking without my much-loved wooden spoon!

Vegetable Peeler

6. OXO Good Grips Peeler – I’ve always liked this type of peeler over the swivel peelers (and of course, my husband is the opposite, so we have 2 peelers!), and this one by OXO Good Grips is the one I’ve had for over 3 years now.

I peel veggies or fruits every day, and this kitchen tool comes in handy! It usually lives in our dish strainer, since we use it and rinse it off so much, it never usually makes it into a drawer!

Microplane Zester

7. Microplane Zester – I love, love, love my zester! I bought mine after seeing one on a cooking show years back, and I’ve loved it ever since my first use.

I most often use it for zesting lemons, limes and oranges, but also love it for grating fresh garlic and ginger (I use it for garlic the most!). Every kitchen should have a microplane zester!

Ball Mason Jars

8. Ball Mason Jars – These jars have to be one of the best inventions ever. You can use them for canning, for simply soring foods in the cupboards and refrigerator, and even use them as drinking glasses! There are a million and one crafty things you can do with them, too, but I mostly use them in my kitchen.

I use my mason jars as food and beverage storage the most. I organized my entire pantry with over 30 jars, storing things like beans, quinoa, pasta, oats, and chocolate chips. I also love using these mason jars for storing smoothies and juices in the fridge.

Note: I mostly use the pint & half pint size jars.

Blender

9. Blendtec Total Blender – This list would be incomplete without my beloved blender. After years of a crappy, cheap blender that would leave chunks in my smoothies, I upgraded to this beauty. I use it every day for smoothies!

I also bought the Blendtec Twister Jar, in addition to the blender, to make things like nut butters and hummus (we make nut butter at least once a week!). It was also worth every penny!

Pyrex Storage

10. Pyrex Glass Storage Containers – Every kitchen needs a few (or in my case, a LOT) of storage containers for extra food, and my top pick is Pyrex.

I use them for everything! Sauces, leftovers, cut up fruit & veggies. I recently upgraded to glass storage containers and haven’t looked back since. No discolouration on the containers, no yucky smells (even after they’ve been washed!). I also love that, because they’re glass, I can see into them without opening the lids.

What are the top used kitchen tools in your home? Share in the comments!

Filed Under: How-to Guides Tagged With: reading, tips and tricks

Where Vegans Get Their Protein

June 13, 2014 2 Comments

Ah, yes. The question every vegan is asked on a regular basis. Once you switch to a plant-based diet, suddently everyone is an expert on nutrition. Why is my protein intake a concern to these people anyway?

From what I’ve learned, people don’t like change. They fight it. Even if the change is not their own. So, when I switched to a vegan diet almost a year ago, I wasn’t that shocked when I first got asked the question “where do you get your protein?“, because I was prepared. I knew people would ask questions.

Where Vegans Get Protein

Contrary to what my friends & family thought, I actually did a lot of research before switching to a new way of eating.

Although this did happen pretty much overnight (it was the minute after Vegucated was over), I did my homework. I made sure that eating a vegan diet was healthy, I made sure that it was possible to get all of the vitamins that I needed, and I made sure that I was doing it for all the right reasons.

I didn’t switch to a plant-based diet solely because I love animals (although that was a big part of it), I did so mostly because it is simply better for you. Plants are better for you than animal products. It’s true.

So now, because I’d like to have a resource to send to those ignorant people that ask my where my protein intake comes from, here is a list of protein sources for vegans.

Pritein Sources

  • Tempeh (19g in just under 1/2 cup)
  • Lentils (9g in just under 1/2 cup)
  • Tofu (8g in just under 1/2 cup)
  • Peanut Butter (8g in 2 tbsp)
  • Quinoa (14g in just under 1/2 cup)
  • Soy Milk (3.3g in just under 1/2 cup)
  • Pumpkin Seeds (19g in 100g)
  • Roasted Almonds (21g in just under 1/2 cup)
  • Pine Nuts (14g in 100g)
  • Peanuts (26g in just under 1/2 cup)
  • Brown Rice (2.6g in just under 1/2 cup)
  • Corn (9g in just under 1/2 cup)
  • Pistachios (20g in 100g)
  • Sunflower Seeds (21g in 100g)
  • Cashews (18g in just under 1/2 cup)
  • Flax Seeds (18g in 100g)
  • Sun-dried tomatoes (14g in 100g)
  • Seitan (75g in just under 1/2 cup)
  • Avocado (2g in 100g)
  • Black Beans (22g in just under 1/2 cup)
  • Chia Seeds (17g in 100g)
  • Barley (12g in just under 1/2 cup)
  • Kidney Beans (9g in just under 1/2 cup)
  • Edemame, Cooked (11g in just under 1/2 cup)
  • Blackeyed Peas (3g in just under 1/2 cup)
  • Navy Beans (8g in just under 1/2 cup)
  • Peas (5g in just under 1/2 cup)
  • Lima Beans, Boiled (8g in just under 1/2 cup)
  • Spinach (2.9g in just under 1/2 cup)
  • Broccoli (2.8g in just under 1/2 cup)
  • Asparagus (2.2g in just under 1/2 cup)
  • Potatoes(2g in just under 1/2 cup)
  • Brussels Sprouts (3.4g in just under 1/2 cup)
  • Oats (17g in just under 1/2 cup)
  • Kale (4.3g in just under 1/2 cup)
  • Chickpeas/Garbanzo Beans (19g in just under 1/2 cup)
  • Walnuts (15g in just under 1/2 cup)
  • Sprouted Grain Bagels, Buns, etc. (varies)
  • Whole Wheat Pasta (varies)
  • Buckwheat (13g in just under 1/2 cup)
  • Couscous (3,8g in just under 1/2 cup)
  • Bulgur (12g in just under 1/2 cup)
  • Millet (2.8g in just under 1/2 cup)
  • Whole Wheat Bread (13g in 100g)

How much protein do vegans need?

According to PETA:

Nutrition experts estimate that most of us need between 0.8 and 1 gram of protein per day for every kilogram of body weight. That works out to 55 grams of protein per day for someone who weighs 150 pounds or approximately 10 percent of normal caloric intake (people in endurance training and pregnant women might require a bit more, of course).

If a vegan eats a reasonably varied diet and consumes a sufficient amount of calories, he or she will undoubtedly get enough protein. And, unlike animal protein, plant-based protein sources contain healthy fiber and complex carbohydrates.

I recently tracked just how much protein I was getting in a day (over the course of 1 week) and it was over 70g a day on average, which is way more than I was getting as a non-vegan, I’m sure (I wasn’t eating many healthy foods back then)!

So – there. I get enough protein, okay? Thanks for asking. Now please don’t ask me again.

Filed Under: How-to Guides Tagged With: reading, tips and tricks

How to Sprout Lentils

June 4, 2014 2 Comments

Sprouts are one of the easiest things you can make at home. I used to buy sprouted lentils all the time, because they are awesome in salad, but now I make my own because the simplicity is hard to beat. Not to mention, it’s much more inexpensive to sprout lentils at home than to buy sprouted lentils at the store!

So, why do you want to eat sprouted lentils anyway? Why are they better than regular lentils?

While cooked lentils are a powerhouse of nutrition, sprouted lentils are even better. They’re easier to digest, leave you with less gas & bloating, and sprouting increases the amount of vitamins in the lentils.

You only need 4 things to make your own sprouted lentils: a mason jar & ring, very thin cloth (I used cheesecloth), water, and dried lentils.

Sprout-Lentils-Supplies

The first thing you want to do is put some lentils in a jar (I used about 1/4 cup lentils and 3/4 cup water).

The lentils are going to expand quite a bit, so don’t put too many of them in there. Just a little bit will yield quite a few lentils once they’ve sprouted.

Sprouting-Lentils


Put the lid on your jar, with the piece of thin cloth underneath. Make sure it’s on there tight.

Then stare at your jar of lentils. This is going to be so exciting! Homemade sprouted lentils for salads, in regular-lentil dishes and even as a tasty snack on their own!

Sprout-Lentils

How-to-Sprout-Lentils

Put your jar in a dark corner of your kitchen and leave them alone for 24 hours.

I put mine in the back corner of my kitchen, away from direct sunlight.

Lentils-Sprouts

After 24 hours, drain the water, rinse the lentils and put them back in the jar. Add a new piece of thin cloth to the jar, do NOT add any more water, put the lid on the jar and let it sit in a dark corner again, for about 12 hours – only this time, lay it on it’s side.

Lentil-Sprouts

Rinse the lentils, drain them, and add a new piece of cloth, Leave them out of direct sunlight, repeat this process every 12 hours, until your lentils have sprouted and the sprouts are at least 1/4 inch in length. This took about 3 days for me.

Vegan-Lentil-Sprouts

Spread the lentils out on a towel and let air dry before storing in the refrigerator (in an air-tight dish). They will last for 5-7 days.

Green-Lentil-Sprouts

Look how cute they are!

What? Lentils can be cute, can’t they?

Lentil-Sprouts-Vegan

Filed Under: How-to Guides Tagged With: beans and legumes, tips and tricks

  • 1
  • 2
  • Next Page »

I'm Cassie - vegan food lover and animal rights activist. I live in Vaughan, Ontario, right near Toronto, with my husband, our 2 kids, 3 cats, and a dog that thinks he's a cat, too. I love to cook and share delicious vegan food with everyone I know. MORE →


Top 10 Posts

  • Super Simple Vegan Pad Thai
  • Vegan Cauliflower Mac & Cheese
  • Vegan Veggie & Black Bean Enchiladas
  • Zucchini Fritters with Vegan Sour Cream
  • How to Make Vegan Ricotta Cheese
  • 30 Tasty Vegan Lunch Ideas
  • 3 Ingredient Vegan Gnocchi
  • Best Ever Vegan Fried Rice with Scrambled Tofu
  • Quinoa & Chickpea Tabbouleh Salad
  • 20 Delicious Vegan Dinner Ideas
Top 10 Vegan Cookbooks

Copyright © 2025 · Genesis Framework by StudioPress · WordPress · Log in