Vegan Recipes from Cassie Howard

Vegan Insanity >> Vegan recipes that are delicious and easy to make. Plus, kitchen, cooking & shopping tips!

  • Home
  • About
    • Inside My Vegan Pantry
    • My 1 Year Vegan Anniversary
    • How I Got Over My Cheese Addiction
  • Recipes
    • Breakfast
    • Lunch
    • Dinner
    • Dessert
    • Snacks/Appetizers
  • Resources
    • Is it Expensive to be Vegan?
    • Top 10 Kitchen Tools
    • Top 10 Cookbooks
    • Vegan Picks
    • How-to Guides
    • Cooking Tips
    • Recipe Ideas
  • Contact

Mini Chocolate Chip Cupcakes with Vanilla Buttercream Frosting

September 17, 2014 7 Comments

Vegan-Chocolate-Chip-Cupcake-Minis

Today is a special day for me.

It’s my 1 year vegan anniversary! One year ago today, I watched the documentary Vegucated, and it changed my life forever. It’s now been 365 days since I decided to make the switch to a vegan diet.

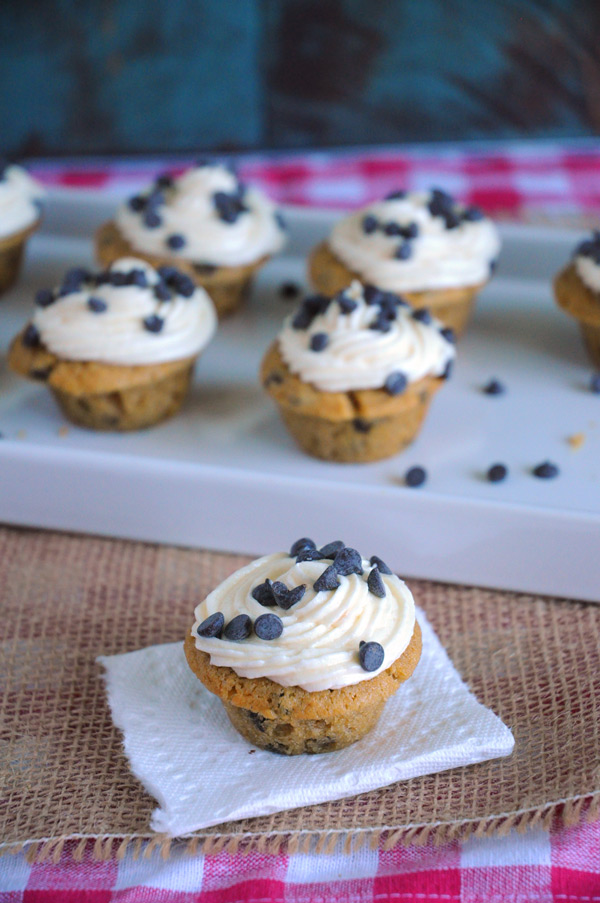
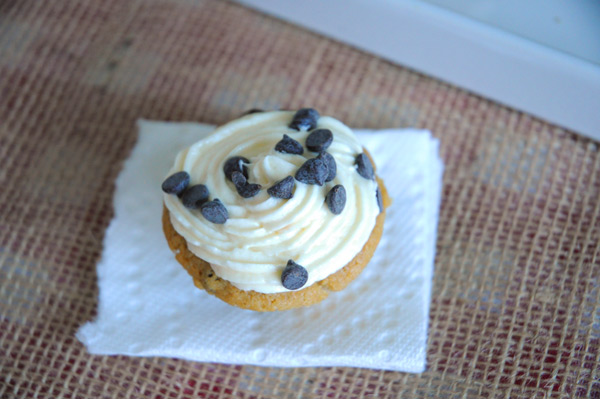
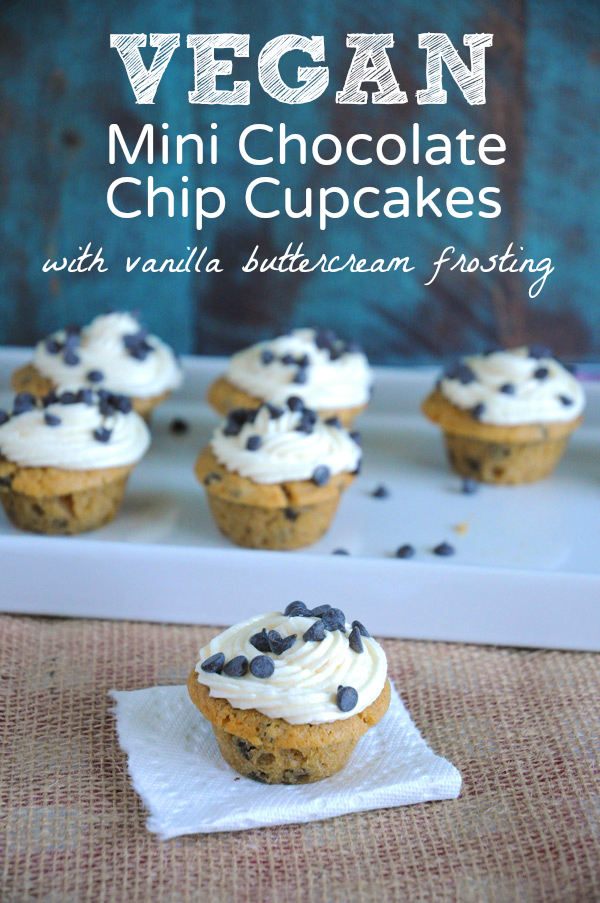
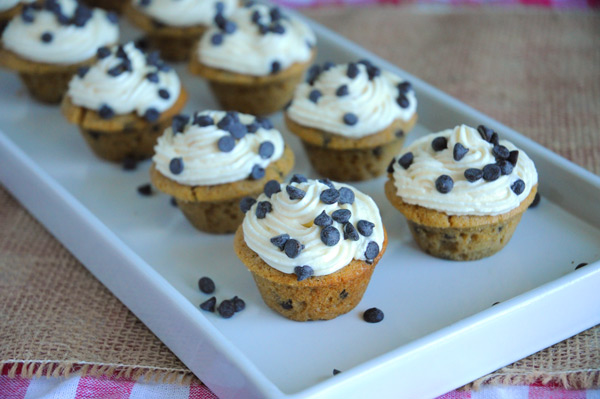
And to celebrate, I made myself some yummy chocolate chip cupcakes. Then slathered them with vanilla buttercream frosting. ‘Cause that’s how I roll.

Mini-Chocolate-Chip-Cupcakes-Vegan

But first, a few things I’ve learned since switching to a vegan diet:

  • It’s not as hard as you think it will be to eliminate all animal products from your diet.
  • Instead of thinking about foods I was eliminating, I thought about all the new foods I would be adding to my diet. This made it much easier for me to make the switch.
  • Once you stop eating animal products, people are suddenly extremely concerned about your protein intake. And iron. And calcium.
  • There are a ton of amazing vegan food substitutes out there that, although are not ideal on a regular basis (as they are often highly processed), make transitioning to a vegan diet so much easier.
  • Vegan food is kind of delicious and amazing. And by kind of, I mean definitely.

Mini-Vegan-Chocolate-Chip-Cupcakes

Things that have happened to me since switching to a vegan diet:

  • My compassion for animals skyrocketed. It’s always been pretty high to begin with, but I actually feel compassion for bees and flies, elephants, chickens and whales now, too. All animals are friends. Not food!
  • I have lost weight (without even trying). It’s been months since I’ve stepped on a scale, but at that point it was 10 pounds.
  • I’ve lost my love of all things super-sweet. In fact, super-sweet foods make me feel ill most of the time. I even switched to dark chocolate, when before, that stuff tasted like burnt cardboard to me. Now – I love it.
  • I’m more excited to cook now, when before, I was bored with the repetition of meat, potato/rice, veggie. My meals are way more exciting these days!
  • My hair is stronger and no longer falling out every time I run a brush through it.
  • My nails are stronger and growing like crazy.
  • I’ve introduced a whole  heap of new food to my diet, things that I never knew existed before are currently some of my favourite foods.
  • I’ve increased my awareness of the things I put in my body.
  • I haven’t had a pimple in an entire year. Yippie!

Vegan-Chocolate-Chip-Cupcakes

Foods/Drinks that I consume (and love) now, that I wouldn’t touch before:

  • Tofu!
  • Asparagus
  • Avocados
  • Mangoes
  • Dandelion Greens
  • Swiss Chard
  • Farro
  • Freekeh
  • Buckwheat Groats/Flour
  • Cashews
  • Coconut Water
  • Hemp Milk/Protein/Seeds/Oil
  • Bananas (I used to hate them!)
  • Agave

Mini-Chocolate-Chip-Cupcakes

My life has changed a lot in the last year, and all for the better. Happy 1 year anniversary to me!

Chocolate-Chip-Muffin-Cupcakes-Vegan

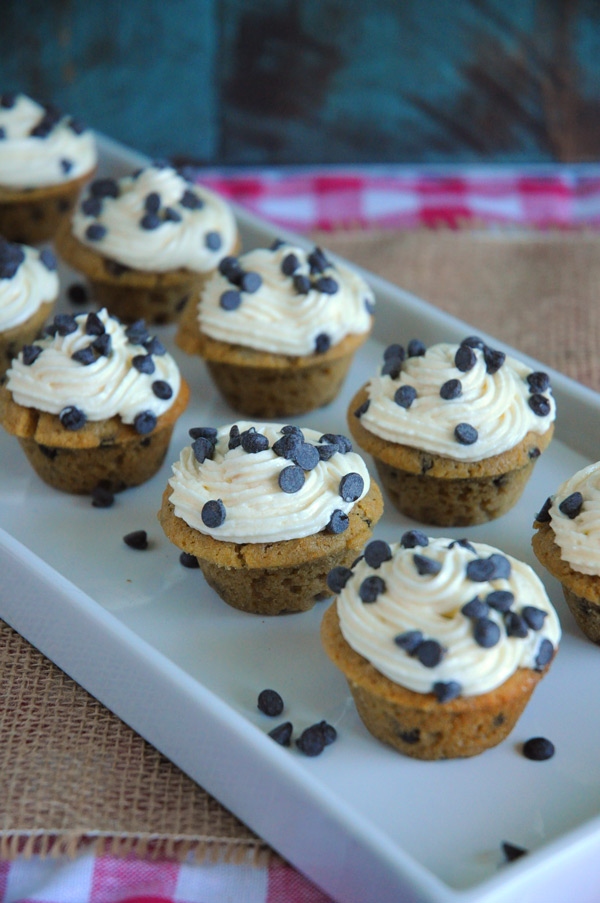
Now, time to stuff my face with these amazing chocolate chip cupcakes.

They’re moist, sweet, chocolate-y and the vanilla buttercream frosting on top, well, that just takes these babies right over the edge. Perfect for a 1 year vegan celebration.

Chocolate-Chip-Muffin-Cupcakes

Mini Chocolate Chip Cupcakes with Vanilla Buttercream Frosting
Recipe Type: Dessert
Author: Vegan Insanity
Prep time: 30 mins
Cook time: 12 mins
Total time: 42 mins
Serves: 24 cupcakes
Ingredients
  • Chocolate Chip Cupcakes
  • 1 cup non-dairy milk (I used almond milk)
  • 1 tsp apple cider vinegar
  • 1/2 cup vegan butter, softened (I used Earth Balance)
  • 3/4 cup brown sugar
  • 1 tsp vanilla
  • 1 1/2 cups kamut flour
  • 1 1/2 tsp baking powder
  • 1/2 tsp baking soda
  • 1/4 tsp salt
  • 1/2 cup + 1/4 cup vegan chocolate chips
  • Vanilla Buttercream Frosting
  • 1/2 cup vegan butter (I used Earth Balance)
  • 2 1/2 cups powdered sugar
  • 1/2 tsp vanilla
  • 2 tbsp non-dairy milk (I used almond milk)
Instructions
Chocolate Chip Cupcakes
  1. Preheat oven to 350F. Spray your muffin pan with non-stick spray (or use paper liners).
  2. In a small bowl, add non-dairy milk and vinegar. Set aside.
  3. In a large bowl, add butter, sugar and vanilla, and using an electric mixer, beat until light and fluffy.
  4. Sift in the flour, baking powder, baking soda, and salt. Add in the milk/vinegar mixture and beat again until incorporated. Do not over-mix.
  5. Add in 1/2 cup chocolate chips and mix with a large spoon, until combined.
  6. Divide batter evenly among your cupcake holders, being sure not to over-fill. You will likely have a bit of batter left over.
  7. Bake for 12 minutes, or until a toothpick comes out clean. Set aside and allow to cool.
Vanilla Buttercream Frosting
  1. In a large mixing bowl, add your butter, powdered sugar, vanilla and non-dairy milk. With an electric mixer, beat until light and fluffy. If the frosting is too thick, add a bit more non-dairy milk. If it is too thin, add a bit more icing sugar. Add in a drop or two of food colouring too, if desired.
  2. Once your cupcakes have cooled completely, frost them and sprinkle a few more chocolate chips on top (the remaining 1/4 cup, divided). I used a piping bag to pipe the frosting on my cupcakes, but you don’t have to!
3.2.2807

Vegan-Chocolate-Chip-Muffin-Cupcakes

Filed Under: Dessert, Recipes Tagged With: chocolate, cupcakes, nut free option, quick and easy, soy free

Big Vegan Taco Salad

September 16, 2014 5 Comments

Big-Vegan-Taco-Salad

Hello, my name is Cassie, and I’m still holding on to summer with all I’ve got. Will. Not. Let. It. Go.

Considering I’ve switched from shorts and t-shirts to pants and sweaters in less than a week, I think it’s safe to say that summer has abruptly just up and left me, without even saying goodbye.

Which just means YAY, FALL FOODS TIME! But it also means summer is gone, and also, much of my fave summer meals. Boo. So let’s give summer one last hurrah, shall we?

Vegan-Taco-Salad

This is a big, monster vegan taco salad that I whipped up on a whim the other day, hoping it would bring summer back to me (it didn’t), and it ended up being one of my most favourite salads that I made all summer.

It’s loaded with veggies, quinoa, vegan taco meat and a healthy drizzle of oh-so-good green sauce. It makes my tummy happy.

Big-Taco-Salad

I also added crushed up tortilla chips (Neil Brothers are THE BEST!) on top, because duh, that’s just obvious. It added a nice salty, crunchy flair to the dish. It also kinda sorta helped with getting my two picky kids to eat a meal full of VEGETABLES.

Goodbye summer, you will be missed! And please… let fall last awhile before old man winter comes along! Pumpkin EVERYTHING is calling my name…

The-Big-Vegan-Taco-Salad

Big Vegan Taco Salad
Recipe Type: Salad
Author: Vegan Insanity
Prep time: 20 mins
Total time: 20 mins
Serves: 1-2
Ingredients
  • Creamy Green Sauce
  • 1 cup raw cashews (soaked for at least 2 hours)
  • 1/4 cup unsweetened almond milk
  • 1/4 cup parsley (cilantro would work, too)
  • 2 tbsp lime juice
  • 1/2 tsp apple cider vinegar
  • 1/2 tsp onion powder
  • 1 medium garlic clove
  • 1/2 tsp sea salt
  • 1/4 tsp freshly ground black pepper
  • Taco Meat
  • 1 cup walnuts, soaked for at least 2 hours
  • 1/2 cup sun-dried tomatoes, soaked for at least 2 hours
  • 1/4 tsp garlic powder
  • 1/2 tsp cumin
  • 1/2 tsp salt
  • Pinch of cayenne pepper
  • Taco Salad
  • 4 cups chopped lettuce (I used mixed greens)
  • 2/3 cup cooked quinoa
  • 1/4 cup red onion, finely chopped
  • 1/4 cup corn
  • 1/4 cup cooked black beans
  • 1/4 cup cherry tomatoes, sliced in half
  • 1/2 cup salsa
  • Handful of crushed tortilla chips (optional)
Instructions
Creamy Green Sauce
  1. Add all ingredients to a high-powered blender or food processor and blend/process until smooth and creamy. Set aside.
Taco Meat
  1. Drain walnuts and sun-dried tomatoes.
  2. Add all ingredients to a food processor and process until combined, and still a bit chunky. Set aside.
Taco Salad
  1. On one large plate or 2 medium-sized plates, add your lettuce, quinoa, red onion, taco meat, corn, the black beans, cherry tomatoes and salsa.
  2. Drizzle on a heavy amount of dressing, sprinkle with crushed tortilla chips, if desired, and dig in! If you have any left over, the dressing should last in the fridge for 4-5 days.
Notes
*Make this recipe gluten-free by omitting the tortilla chips (or using a gluten-free variety).
3.2.2807


Filed Under: Recipes, Salad Tagged With: beans and legumes, dinner, gluten free, lunch, oil free, quinoa, soy free

Gluten-Free Sweet Potato Shepherd’s Pie

September 11, 2014 9 Comments

Vegan-Sweet-Potato-Shepherds-Pie

Fall is in the air. Can you smell it?

Though it’s not technically fall yet, I have already started making fall foods, because fall foods are the BEST EVER EVER.

Like this sweet potato shepherd’s pie. Gluten-free and loaded with good stuff like lentils, peas, carrots and corn. Perfect for fall.

Shepherds-Pie

You can really add any veggies you’d like to this dish, but I’ve always loved corn, peas and carrots. Along with celery, onions and garlic for some flavour, of course. I also swapped the traditional potato topping and used sweet potato instead.

Sweet potato:

Is a good source of magnesium (which helps with relaxation)
Is a source of vitamin D, which is hard to get in a vegan diet
Is naturally sweet-tasting
Contains almost twice as much fiber than other types of potatoes
Is good for your heart

So go ahead – stuff your face with sweet potatoes!

Shepherds-Pie-Vegan

I love the hint of sweetness that the sweet potato brings to this dish. It really balances nicely with the vegetables and seasonings.

I always add a sprinkle of paprika on top of my shepherd’s pie, both for flavour and because it looks pretty. And good looking food just tastes better. It’s a fact. Look it up.

So let’s eat up, my friend! This sweet potato shepherd’s pie is not gonna last long around me – get it while you can!

Sweet-Potato-Shepherds-Pie

Sweet Potato Shepherd’s Pie
Recipe Type: Dinner
Author: Vegan Insanity
Prep time: 10 mins
Cook time: 60 mins
Total time: 1 hour 10 mins
Serves: 6
Ingredients
  • 4 medium sweet potatoes, peeled & chopped into small pieces
  • 1 tbsp extra virgin olive oil
  • 1/2 cup diced celery
  • 1/2 cup diced onions
  • 1 large garlic clove, minced
  • 1/2 cup diced carrots
  • 4 1/2 cups cooked lentils
  • 2 cups diced tomatoes
  • 2 tbsp soy sauce
  • 2 tbsp non-dairy milk (I used almond)
  • Salt & pepper to taste
  • paprika & fresh parsley, for garnish
Instructions
  1. Preheat oven to 350F.
  2. Steam your sweet potatoes and set aside.
  3. While the sweet potatoes are heat a large pan over medium heat. Once warmed, add a tbsp or so of oil, then add in the diced celery, onion, garlic, tomatoes and carrots. Cook for about 5 minutes, or until softened.
  4. Add the cooked lentils and soy sauce to the veggies, and heat until warmed through.
  5. Once your sweet potatoes are finished steaming, mash with the non-dairy milk some salt & pepper.
  6. Scoop the lentil & veggie mix to the bottom of a 9×13 baking dish, then spread the mashed sweet potatoes over top and spread in an even layer.
  7. Bake for about 25 minutes, or until the top has browned lightly. Sprinkle with a bit of paprika and fresh parsley, if desired. Serve warm.
3.2.2807

Vegan-Shepherds-Pie

Filed Under: Entrees, Recipes Tagged With: beans and legumes, dinner, gluten free, nut-free, potatoes, soy free

Perfect Peach & Oat Breakfast Bars

September 9, 2014 5 Comments

Peach-Oat-BarsPeach. Oatmeal. Dates.

Yummy. Yummy. Yummy.

Peaches have always been one of my favourite fruits. I put it in oatmeal, in banana ice cream, in crepes, and of course – directly in my mouth. So sweet and juicy. No other stone fruit compares to the deliciousness that is peaches!

When summer comes, I buy baskets and baskets of them at a time, and I still always seem to eat them all up within days. I just can’t get enough.

And now that summer has come to an end, that means my lovely peaches are making their way out of my kitchen soon. So sad. But peaches that aren’t in season are even sadder, so I rarely eat peaches during any season other than summer.

Peach-Oat-Bars-Vegan-SquaresAre you drooling yet?

And with just a tablespoon of maple syrup in the entire pan, these are a healthy breakfast bar that any peach lover would enjoy!

Peach-Oat-Bars-VeganThese bars are a bit crumbly, so I suggest letting them cool completely, and then keeping them in the fridge and eating them cold or at room temperature, not warmed.

If you don’t have access peaches, you can replace them with another fruit of your choice, such as strawberries or blueberries. You may have to adjust the amount of fruit added, though. Enjoy!

Vegan-Peach-Oat-Bars

Perfect Peach & Oat Breakfast Bars
Recipe Type: Breakfast
Author: Vegan Insanity
Prep time: 10 mins
Cook time: 25 mins
Total time: 35 mins
Serves: 9
Ingredients
  • 2 cups rolled oats*
  • 1/4 cup chopped dates
  • 2 tbsp slivered almonds
  • 1 tbsp chia seed
  • 1 tsp baking powder
  • 1 tsp cinnamon
  • 3/4 cup + 2 tbsp non-dairy milk (I used almond milk)
  • 1 tsp vanilla
  • 1 1/4-1 1/2 cups chopped, peeled peaches
Instructions
  1. Preheat oven to 350F. Line a 8×8 inch baking dish with parchment paper, leaving a bit of overhang.
  2. In a large bowl, combine oats, chopped dates, chopped almonds, chia seeds, baking powder, and cinnamon.
  3. In a medium bowl, combine non-dairy milk, vanilla and peaches. Stir the wet ingredients into the dry ingredients until combines, making sure to not mush the peaches too much.
  4. Spread into your baking dish and bake for about 20-25 minutes.
  5. Remove pan from oven and allow to cool for at least 20 minutes. Remove from pan by lifting up the parchment paper. Place on a large cutting board and cut into 9 squares.
Notes
*Use gluten-free oats to make this dish gluten-free.
3.2.2807


Filed Under: Breakfast, Recipes Tagged With: gluten free, oil free, quick and easy, soy free, squares and bars

Gluten-Free Chilled Chocolate & Hazelnut Torte

September 3, 2014 14 Comments

Gluten-Free-Chocolate-Torte-Vegan

I’m not the only one still holding on to summer, am I? I am trying to squeeeeeze just a FEW MORE days, then a few days more, then a few days more. Why does summer have to end? Can’t it be summer forever? It’s not like the other seasons are any better. Just say bye bye those, and keep summer forever and ever and ever.

Maybe I need to move to California. Or Florida. Or anywhere other than Canada where it ‘s cold for about 8 months of the year. So lame.

Hazelnut-Crust

ANYWAY. Let me introduce you to my SUMMER (ahem) chilled torte. Look at that crust! Look at that chocolate! Chilled. to. Perfection. But then we have to make it pretty of course. Because it would be wrong to eat ugly food.

Vegan-Gluten-Free-Chocolate-Torte

Vegan-Chilled-Chocolate-Torte

A drizzle of sweet cashew cream, some shaved chocolate and a bunch of chopped hazelnuts on top. Done and done.

Sigh. I love pretty food.

This torte is gluten-free, and you can even make it raw if you don’t bake the crust and use agave instead of maple syrup.

Chilled-Chocolate-Torte

You MUST serve this cold, otherwise it takes weird and not right and PLEASE don’t do it. Once you take it out of the freezer, pop it out of the pie plate and let it sit at room temperature for at least 15 minutes before slicing and eating. That’s it. 15 minutes. You can do it!

Confession: Sometimes when I am crazy hungry and need chocolate, like YESTERDAY, I will only wait 10 minutes. Don’t tell. Do as I say, not as I do, friends.

Now LET’S EAT!

Gluten-Free-Chocolate-Torte

Gluten-Free Chilled Chocolate & Hazelnut Torte
Recipe Type: Dessert
Author: Vegan Insanity
Prep time: 4 hours 40 mins
Total time: 4 hours 40 mins
Serves: 8
Ingredients
  • Crust
  • 3/4 cup hazelnuts
  • 1/4 cup coconut oil
  • 2 tbsp maple syrup
  • 1/4 tsp salt
  • 1/2 cup oat flour
  • 1 cup gluten-free oats
  • Chocolate Filling
  • 1 1/2 cups cashews, soaked for at least 2 hours
  • 1/2 cup maple syrup
  • 1/2 cup coconut oil
  • 1/3 cup cocoa powder
  • 1/3 cup dairy-free chocolate chips, melted
  • 2 tsp vanilla
  • 2 tbsp almond milk
  • 1/2 tsp salt
  • Sweet Cashew Drizzle & Toppings
  • 1 1/2 cups cashews, soaked for at least 2 hours
  • 2/3 cups water
  • 1 tsp vanilla
  • 2 tbsp maple syrup
  • 3 tbsp lemon juice
  • Shaved dark chocolate, for garnish
  • 1/4 cup chopped hazelnuts, for garnish
Instructions
Crust
  1. Preheat the oven to 350F. Grease a pie pan with coconut oil or non-stick spray.
  2. In a food processor, process the hazelnuts until it resembles crumbs & sand. Add in the coconut oil, maple syrup, salt, and oat flour. Process until the dough starts to come off the sides of the food processor, then add in the oats and process just until combined.
  3. Crumble the dough over your pie dish, and then firmly press it down, making sure to completely cover the bottom of the dish, and about halfway up the sides.
  4. Poke some holes in the bottom of the crust and place the dish in the oven. Cook for about 12 minutes, or until lightly golden. Set aside to cool for at least 20 minutes.
Chocolate Filling
  1. In a high-powdered blender, add the cashews, maple syrup, coconut oil, cocoa powder, melted chocolate, vanilla, almond milk and salt. Blend until smooth.
  2. Pour the mixture over the cooled crust, smoothing it out with a spatula.
  3. Freeze for at least 4 hours.
Sweet Cashew Drizzle & Toppings
  1. Add all ingredients, except shaved chocolate and chopped hazelnuts, to a high-powdered blender and blend until smooth.
  2. Drizzle this on the chilled torte. Sprinkle some shaved chocolate and chopped hazelnuts.
  3. Freeze for another 30 minutes. Remove from freezer and allow to thaw for 15 minutes before removing from the pie plate, cutting and serving.
3.2.2708


Filed Under: Dessert, Recipes Tagged With: gluten free, soy free

Quinoa, Lentils & Sauteed Greens with a Creamy, Savoury Dressing

September 2, 2014 9 Comments

It’s no secret that I’m a big fan of quinoa bowls. They’re easy, they don’t take long to make, you can prepare them in advance, they’re a simple solution to excess food in your fridge that needs to be used up, AND they travel well. If those aren’t good enough reasons for you to go make yourself a quinoa bowl RIGHTTHISSECOND, I don’t know what is.

Vegan-Quinoa-Lentils-Greens

I often make pretty simple quinoa bowls because I can’t be bothered to slave away in the kitchen for hours on end (usually). So recently, I made this bad boy.

And he was YUM. Only 3 things in my quinoa bowl (including the quinoa) and a delicious, savoury dressing smothered on top. Awww yea! It doesn’t look like much, but it was perfect. The dressing really makes this bowl, though, so if you skip it, you will have a very sad, bland, boring quinoa bowl on your hands.

Lentils-Quinoa-Greens

I’m still working on getting my little ones to eat quinoa bowls, but they are stubborn! They’ll eat the quinoa, but only if it’s plain. One of them will eat the lentils, but only if the other one isn’t around telling her how “gross” they are.

Sigh. One of these days my kids will like more than just bread and chocolate – right? Please tell me I’m right!

So – on to this delicious quinoa bowl masterpiece [not]…

Quinoa-Lentils-Greens

First, cook up some quinoa and divide between bowls. Cook up some lentils and do the same. While those two are cooking, sautee some greens with a tiny bit of oil, salt, and black pepper. Then, make the dressing.

Ta-da! No muss, no fuss. Simple, easy, delicious.

Quinoa, Lentils & Sauteed Greens with a Creamy, Savoury Dressing
Recipe Type: Lunch, Dinner
Author: Vegan Insanity
Prep time: 10 mins
Cook time: 35 mins
Total time: 45 mins
Serves: 2
Ingredients
  • Lentils
  • 1/2 cup brown or green lentils
  • 1 1/2 cups water
  • 1 medium-large garlic clove, crushed
  • 1 bay leaf
  • Quinoa
  • 1 cup quinoa
  • 2 cups water
  • Greens
  • 1 tbsp olive oil
  • 1 cup greens of choice (kale, spinach, swiss chard)
  • 1/2 tsp salt
  • 1/2 tsp freshly cracked black pepper
  • Dressing
  • 1/4 cup nutritional yeast
  • 3 tbsp water
  • 3 tbsp tamari
  • 3 tbsp apple cider vinegar
  • 1 medium-large clove of garlic, grated
  • 3/4 cup extra virgin olive oil
  • 1.5 tbsp tahini
Instructions
Lentils
  1. Add lentils, water, garlic and bay leaf to a small pot. Bring to a boil, then reduce heat to low-medium and simmer about 25-40 minutes, or until most of the liquid has been absorbed and the lentils are tender. Remove bay leaf and crushed garlic. Set aside.
Quinoa
  1. Add quinoa and water to a small pot. Bring to a boil, then reduce heat to low-medium and simmer about 12 minutes, or until most of the liquid has been absorbed and the quinoa is tender.
Greens
  1. Heat oil in a medium pan over medium heat. Once warmed, add the greens and cook until softened. Sprinkle on the salt and pepper, turn off the heat, and set aside.
Dressing
  1. In a small bowl, whisk together all ingredients until smooth.
Putting it all together
  1. Divide quinoa between bowls, then add in the lentils and sauteed greens.
  2. Pour a healthy amount of dressing over each bowl. Serve warm!
3.2.2708


Filed Under: Entrees, Recipes Tagged With: beans and legumes, dinner, gluten free, lunch, quick and easy, quinoa, soy free

How to Make Homemade Almond Milk

September 1, 2014 3 Comments

Homemade-Almond-Milk

Homemade almond milk. Is there anything better?

The correct answer is yes. Chocolate. But other than chocolate? NOPE!

And guess what? Homemade almond milk is one of the easiest things you can make yourself! No more processed milk from the store, for you. Yippie!

Plump-Almonds

First, start off with a bowl of delicious, plump almonds. To get them nice and plump like this, soak them in water overnight, or at least 8 hours.

Soaking your almonds allows you to get the almond milk smoother. Plus, soaked almonds are easier to digest! So go get soaking!

Almonds-in-Blender

Add your soaked nuts to a blender with 4 cups of filtered water. Blend for about 3 minutes, or until smooth, and white, and creamy, and omgosh so good.

Almond-Milk-in-Blender

Like this. Pretty, right? Yes – milk can be pretty. Especially this almond milk.

See how well the blender was able to do with the soaked almonds?

Pouring-Almond-Milk

Although the mixture is smooth, you still want to pour the milk through a nut milk bag to remove any sediment. I use this one that I bought off Amazon for under $10. Worth. Every. Penny.

Squeezing-Almond-Milk

Squeeze, squeeze, and squeeze some more, until no more milk is seeping through the bag. Set aside the almond pulp that is left inside the bag (refrigerate and use in smoothies or dry it out in the oven to make almond flour).

Add the milk back to the blender and add the agave, vanilla and cinnamon. Blend for another minute or so.

Almond-Milk-Homemade

Ta-da! Homemade almond milk in minutes (not including soaking time)! I told you it was easy. Pour into a large air-tight jar and refrigerate for up to 5 days.

And in case you were wondering – YES, it is delicious. I like it 1000x more than the store-bought stuff.

Next up on my list – homemade chocolate almond milk!

Vegan-Almond-Milk

How to Make Homemade Almond Milk
Recipe Type: Homemade Milk
Author: Vegan Insanity
Prep time: 15 mins
Total time: 15 mins
Serves: 8 cups
Ingredients
  • 1 cup raw almonds, soaked for at least 8 hours
  • 4 cups filtered water
  • 1 tbsp agave
  • 1/2 tsp vanilla
  • 1/4 tsp cinnamon
  • 1/4 tsp salt
Instructions
  1. Drain and rinse your almonds, then add to a blender with 4 cups of water.
  2. Blend for about 3 minutes, or until smooth.
  3. Over a large bowl, place a nut milk bag, and then pour the almond & water mixture through the nut milk bag.
  4. Gently squeeze the bottom of the nut milk bag, releasing the almond milk into the bowl. Keep doing this until all of the milk has been released and you are left with a big lump of almond pulp in the bag (set that aside and use in smoothies or dry it out in the oven to make almond flour).
  5. Rinse out your blender and blender lid, and add the almond milk back into the blender, along with the agave, vanilla and cinnamon. Blend again for another minute or so.
  6. Pour almond milk into a large glass jar and refrigerate for up to 5 days.
Notes
*Make sure you shake up the almond milk before using, as it will separate while sitting.
3.2.2708


Filed Under: How-to Guides Tagged With: gluten free, oil free, quick and easy, raw, soy free

Lemon Poppy Seed Pancakes with Blueberry Compote

August 28, 2014 4 Comments

Lemon-Poppy-Seed-Pancakes

You guys – LEMON. And BLUEBERRY. Together forever in these delicious, fluffy pancakes pancakes, loaded with their other best friend – poppy seeds. And then into my belly one after one because omg yumzzzzz.

The lemon and blueberry combination has always been a favourite of mine, but in pancakes it’s the best. THE BEST.

Vegan-Lemon-Poppy-Seed-Pancakes

Normally I just add blueberries to the batter, but this time I went ALL. OUT. (not really, it takes less than 10 minutes, and all you do is throw 3 ingredients into a pot) and made a blueberry compote to go on top of the pancakes. And it was the best decision ever and I will never go back to blueberries inside the pancakes again.

Not. a. chance. Just look at that blueberry goo! Now imagine biting into those pancakes with a scoop of blueberry compote on top, and then close your eyes, chew slowly and OMG are you drooling yet?

I am. I must make more lemon pancakes. But I have a basket of peaches on the counter so maybe I will make a peach compote this time.

Oh my, I think I have created a monster. A delicious, lemony, amazing breakfast monster that just won’t stop! Not that I want it to, of course…

Lemon-Poppy-Seed-Pancakes-Vegan

Lemon Poppy Seed Pancakes with Blueberry Compote
Recipe Type: Breakfast
Author: Vegan Insanity
Prep time: 10 mins
Cook time: 25 mins
Total time: 35 mins
Serves: 6-8 pancakes
Ingredients
  • Pancakes
  • 1 flax egg (1 tbsp ground flax seed + 3 tbsp water)
  • 3/4 cup whole wheat flour
  • 1/2 cup kamut flour (or all-purpose)
  • 1/4 tsp baking soda
  • 1 tsp baking powder
  • 1/4 tsp salt
  • 1 1/2 cup non-dairy milk (I used almond milk)
  • 1/2 tsp vanilla
  • 1 tsp apple cider vinegar
  • 1 tbsp coconut oil
  • 1 tbsp lemon zest (1 medium lemon)
  • 1 1/2 tbsp fresh lemon juice
  • 1 tbsp poppy seeds
  • Blueberry Compote
  • 2 cups fresh blueberries
  • 1/4 cup coconut sugar
  • 3 tbsp water
Instructions
Pancakes
  1. Make your flax egg and set aside to allow it to thicken up.
  2. In a large bowl, whisk together the flours, baking soda, baking powder and salt. Add in the non-dairy milk, vanilla, apple cider vinegar, coconut oil, lemon zest, lemon juice, poppy seeds and flax egg. Mix everything well, but do not over-mix.
  3. Warm your pan over medium heat for about 5 minutes. Spray with non-stick spray and scoop 1/4 cup of the pancake mix (per pancake) onto the hot pan. Cook for about 2 minutes or until bubbles start to form, then flip and cook for another 1-2 minutes, until cooked through.
  4. Repeat until all batter is gone.
Blueberry Compote
  1. Add all ingredients to a small pot and heat over medium-low for about 10 minutes, until it starts to thicken. Mash down the blueberries with a fork and cook for another 2-3 minutes, or until it reaches your desired consistency. Serve over pancakes and top with shredded coconut, if you’d like!
3.2.2807

Lemon-and-Poppy-Seed-Pancakes

Filed Under: Breakfast, Recipes Tagged With: nut-free, pancakes, quick and easy, soy free

  • « Previous Page
  • 1
  • 2
  • 3
  • 4
  • 5
  • …
  • 10
  • Next Page »

I'm Cassie - vegan food lover and animal rights activist. I live in Vaughan, Ontario, right near Toronto, with my husband, our 2 kids, 3 cats, and a dog that thinks he's a cat, too. I love to cook and share delicious vegan food with everyone I know. MORE →


Top 10 Posts

  • Super Simple Vegan Pad Thai
  • Vegan Cauliflower Mac & Cheese
  • Vegan Veggie & Black Bean Enchiladas
  • Zucchini Fritters with Vegan Sour Cream
  • How to Make Vegan Ricotta Cheese
  • 30 Tasty Vegan Lunch Ideas
  • 3 Ingredient Vegan Gnocchi
  • Best Ever Vegan Fried Rice with Scrambled Tofu
  • Quinoa & Chickpea Tabbouleh Salad
  • 20 Delicious Vegan Dinner Ideas
Top 10 Vegan Cookbooks

Copyright © 2025 · Genesis Framework by StudioPress · WordPress · Log in